Subscribe to Follow this Blog

If you like what you see, please subscribe to follow along either in a Reader or by email!

Thursday, July 12, 2012

Organized Diapering Part 1: Why we chose Cloth Diapers

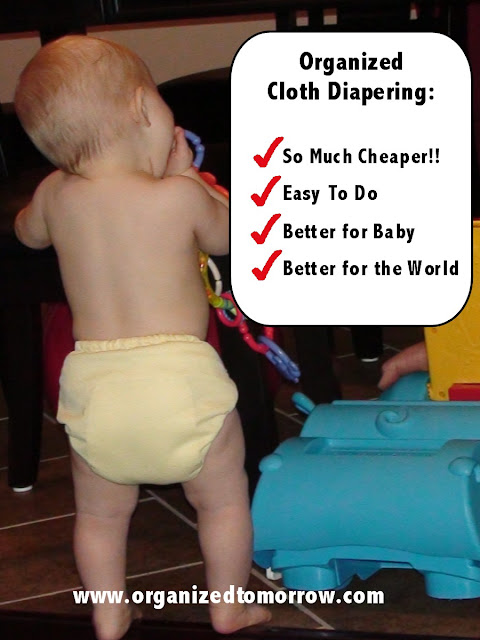
We have used cloth diapers for both girls, which is awesome on many levels.  First, I have only purchased a pack or two of disposable diapers in each size for travel or back-ups, so I estimate we've saved ourselves thousands of dollars.  I have no empirical evidence, but it just seems to me that a soft cloth diaper has got to be more comfortable than a disposable.  And I am happy to be doing a small part to reduce waste in landfills.  On a side note, all children should be required to take a field trip to the dump to see just how much stuff ends up there forever - it really makes you think about what you throw away!!


Anyway, back to diapering...  With our second daughter, we have noticed that we have the diapering system down to a science.  This, along with other experience from the first child, really made those first few months go smoothly, so I thought I would share.

Before the first baby Alyssa, we got 22 Tiny Tush one-size diapers, which are actually still made in the USA!  They cost about $17 each at the time, and we were able to register for them through a local store, Eco in Chico, so we got some help with the up-front costs.  I just looked up the website to get the link, and the style we chose (linked above) are now only $13 each through the website because they've come out with a 2.0 version (they are currently still $18 on Amazon.com).  We elected to get all snaps because I just can't imagine that velcro could maintain its stickyness after all the washing, especially through multiple children!  As shown in the instruction card below, the rows of snaps along the front make the size adjustable. 
{Source}
Since we knew we'd re-use them for future siblings, we kept the colors neutral and split between butter yellow and sage green.  This was a nice number, but in the early months, I would need to wash them a bit often for my taste (more on this in a minute), so we decided to expand to 28 diapers for the second baby Zoe (we just purchased six more).  The one-size diapers are rated to fit between 8 and 35 pounds.  Alyssa was well over 8 at birth, but Zoe started wearing them at just under 8 pounds and they worked fine.  Alyssa potty trained between 18 months and 2 years, and still wore them at night for another six months or so and we weren't close to outgrowing them. 

My daughter in a Tiny Tush diaper at 18 days old
With both girls, we used disposables until the cord stump came off for two reasons.  First, by this time the meconium is long gone (no one wants to try to clean that tarry stuff out!).  Also, the one-size cloth diapers are a bit large and bulky on a newborn (although they totally work without any more leaking than you might expect with a disposable), so it is difficult to fold them in a way that doesn't catch on the cord stump as it dries (it falls off in 4-5 days or so anyway).  If you give birth in a hospital, the hospital supplies you with diapers until you discharge and sends you home with a bunch too, so you still only need a package or two...

You should probably skip this paragraph if looking at poop bother you (but no, I won't be showing you any!).  :)  The other reason I will always be glad that we used cloth diapers from the start is that having to separate the poop from the diaper into the toilet before washing affords you an opportunity to acquaint yourself with what is a "normal" poop for your child in a way that you might not if you just fold the whole thing up and toss the disposable.  At about 3 weeks old, I started to notice little tiny flecks of reddish black in Alyssa's poop, which turned out to be blood.  The saga of trying to diagnose the problem is the subject of another post, focused on being your child's own advocate and learning that doctors don't know everything.  In the end, because I absolutely refused to stop breast feeding, we found out that Alyssa had an intolerance to milk protein (as well as soy protein, since the two have very similar biochemical structures) and we were able to correct the problem by me eliminating dairy and soy from my diet.  I really believe that since Alyssa didn't have any other symptoms (yet) besides the little tiny flecks of blood in her poop, we may not have noticed until much later if we hadn't used cloth diapers...  Alyssa outgrew the intolerance by the age of one (YAY!).

There are two things to know about cloth diapering (at least these types of cloth diapers)...

First, we were advised by Eco in Chico to use a particular type of soap in washing the diapers and were warned that "normal" detergents might destroy the leak-proof part of the covers over time.  That suggested soap was Charlie's Soap.  I know at least one person to whom the cover destruction happened after using the Costco brand Free & Clear soap, so I have always used the suggested soap for all of our laundry.  Switching back-and-forth and only using the suggested soap for diapers is said not to work because "normal" detergents leave residues in the washer.  I probably will never go back to "normal" detergents after using Charlie's Soap anyway because I happen to love it!  It ends up being a bit more expensive than "normal" detergent, but I am very chemical-conscious, and I buy it in a 4-gallon bucket that lasts well over a year, so I don't mind any small additional cost.  I'm able to get the 4-gallon size through another eco-conscious local store, Cathy's Sew & Vac. I think now there are several options for laundry soap that will work safely, but I've never investigated those.

{Source}
The second thing to know about cloth diapering is that the bulk of the cloth diapers will affect the size of clothing your child wears.  Bottoms will fit at about a size larger than tops, at least until the 2T-3T sizes.  And in our experience for 18 month or smaller clothing, fitted bottoms like jeans are just not comfortable for the child, or they would have to be such a larger size that they'd be way too long.  We have used almost all stretchy bottoms, skirts, and dresses.  Not at all a big deal, but something to think about.

I ended up having much more to say about cloth diapering that I had anticipated, so in the next post on this topic I will show you our diapering system specifically.

Please know that while I welcome the opportunity to be involved in the official review of products, the manufacturers of the products I have discussed today have no idea that I exist, and these opinions are 100% my own and I have in no way been compensated or provided with complimentary test products. :)

This post has been linked up to the following link parties:

Weekend Bloggy Reading @ Serenity Now 
Frugal Friday @ Life As Mom 
Simply Natural Saturdays @ The Pistachio Project 
The Sundae Scoop @ I Heart Nap Time 
The Sunday Showcase @ Under the Table and Dreaming 
Mom's Monday Mingle @ Naptime Review 
Make It Pretty Monday @ The Dedicated House
Simply Sensational Tuesday @ Organizing Homelife
Tutorials & Tips @ Home Stories A to Z 
Home Decor & Organizing Party @ organize & decorate everything 
Frugal "I Did It" Tuesday @ Off the Grid at -30 
Thursday Mommy-Brain Mixer @ Two in Diapers

Wednesday, July 4, 2012

Happy 4th of July!!

I took this picture at fleet week in San Francisco back in 2007, and I still love it.  I hope everyone has a safe and enjoyable 4th of July!! 


Organizing for Weight Loss

My husband and I are both determined to shed a few pounds.  Both of us eat fairly healthily, but over the past few years and two pregnancies, our portion sizes have crept up and, especially in my case, the sweet tooth that sets in after the kids are off to bed (and I'm apparently too tired for willpower) is AWFUL!  And seeing things like this all over Pinterest doesn't help! :)

{Source via Pinterest}

We know ourselves well enough to know that in order to focus on weight loss for a little while, we need a diet with structure and clear rules, but counting every little thing is also difficult and gets annoying (which for us means we are more likely to abandon the rules).  We've both had success on the Atkins diet in the past, before we had kids, but I also wanted a more balanced option that has a maintenance phase (or back to "normal") that is well-aligned with the conscious choices we already make for our kids (such as minimizing refined sugars and processed foods).  Our compromise is the South Beach Diet.

I was actually excited to start, since one of the goals of the induction phase (phase 1) discussed in the South Beach diet book is the elimination of cravings, and that is my biggest challenge.  Plus, since I recently stopped breastfeeding my youngest, I'm choosing to take a more empowered attitude to reclaim my body rather than be saddened by the thought of no longer breastfeeding, perhaps forever (since we aren't sure we're going to have any more...). 

In order to succeed in any diet, it is important to organize yourself, your pantry, and your shopping lists accordingly.  This is the first time we are dieting and feeding children at the same time, so there is no way to eliminate fruits and starches from the house altogether for this first phase during which we eliminate them entirely.  The answer is to stock the fridge with plenty of veggie choices and be prepared, especially with diet-approved snacks (like celery sticks, string cheese, and nuts). 

It is more important than ever to plan out meals when sticking to a diet plan.  I still use my Excel meal planner and shopping list system for planning, with a few modifications.  I have also started planning breakfasts because for the first phase of South Beach the breakfasts all involve eggs.  Luckily it is super easy to make omelets and scrambles with different combinations of vegetables for very different meals that all utilize eggs.  At the same time, for the inevitable night where dinner prep gets started too late to go with the planned meal, I am determined to have enough salad fixings on hand at all times that we can always throw together a yummy salad (without getting bored with the same old salads over and over).

Thankfully my system of washing, cutting, jarring and vacuum packing lettuce makes salad making quick and easy during the week.  I continue to expand my veggie prep to include chopped versions of other veggies ready to go vacuum sealed in jars as well.  I will report on how long they seem to last, although we are plowing through veggies these days (which can't be a bad thing!), so it is difficult to really gauge how long they'll really last, but I'll try to do some experiments! 


I am thrilled to report that just over 2 weeks in and my habit of craving sweets at night is gone, but I still want something sweet and chocolate here and there (I'm still a woman!).  I am not a dark chocolate lover, so I was happy to find this No Sugar Added milk chocolate bar at Trader Joe's.  Just one or two little squares is a satisfying treat.

 
And thankfully I can also find things like this Low Carb Caramel Machiatto Tiramisu on Pinterest that I can't wait to try!!

{Source via Pinterest}

I will use this outlet to spotlight diet-friendly recipes and meal ideas that can translate to any healthy lifestyle, as well as ideas for fitting exercise into a crazy schedule.  Be sure to let me know if you have ideas or questions along the way!

This post is linked up to the following link parties:

Weekend Bloggy Reading @ Serenity Now

Wednesday, June 27, 2012

Sweet Cupcakes: A First Birthday Party

When I found this super cute paper on sale at Michaels, the cupcake theme for my daughter Zoe's first birthday party was set!  I also picked up some glittery silver paper and glitter paints to coordinate.  :)


I borrowed the Sweet Treats Cricut cartridge from my awesome sister-in-law to put the invitations together and had my older daughter Alyssa help me paint the cupcake and candle with glitter paint. I wrapped some glittery pink ribbon around the cupcake wrapper to give it some dimension and texture. 


We had Alyssa's first birthday party at our house, and from that party we learned that our house and yard are just a little too small to have a gathering of more than just a few friends for now.  But our budget didn't allow us to rent a big space or even do something at an activity center (such as a gym, bowling alley, or roller skating rink).  Since the weather is pretty nice around both girls' birthdays (end of May and early September), we luck out and are able to go to a park for our parties.  I'm such a planner that I just have to have a reservation for a party, rather than scoping out a set of picnic benches at the park the day of the party, especially in early June!  I called around to the recreation departments in the area and was surprised to find the local parks in Paradise now charge a fee between $50 and $150 dollars to rent BBQ/party spaces!  Luckily, the super-fun Caper Acres park in Chico still allows reservations in their "birthday rings" for free.  Whew!!  With play equipment for kids of all ages, the only challenge was keeping them together for the party activities.  :)

I'm not huge on party decorations anyway, so it wasn't very hard to avoid buying balloons and streamers to keep costs at a minimum, but when it comes to tablecloths at a park, those are a must!  A friend gave me an awesome tip that the newspaper here in Paradise, which also prints publications for many surrounding areas sells the "ends" of the large newspaper rolls, which still have TONS of paper left, for super cheap ($1.50 per roll!).  We picked some of these up to use now and for many (many, many) art projects to come, taped them to the tables, and put some crayons out for everyone to draw all over them during the party - it was great! 

And the remaining roll was perfect to give us a clean place to set all of our stuff instead of taking up real estate on a table or sitting on the dirt at the park!


I made chocolate and yellow cake cupcakes and three different kinds of frosting, pink vanilla, chocolate and Nutella frosting from Pinterest (it is as yummy as it sounds!).  Since Zoe has a cousin with a nut allergy, I made a double batch of chocolate frosting following the Nutella frosting recipe, but omitting the Nutella.  Then I split the batch in half and added Nutella to one batch, and kept some plain chocolate.  Both were awesome!  A side note: I added all the ingredients together and mixed with the hand mixer instead of mixing things together in stages (since I failed to read the directions on the recipe ahead of time - whoops!), and the frosting turned out just great.


Since we didn't play any games (not necessary at the park!), I set up a cupcake decorating station for the kids.  I made a set of each kind of cupcake in my mini-muffin pans, and set out the pink vanilla and chocolate frosting and sprinkles and let the kids decorate their own cupcakes.  The "do-it-yourself" cupcakes were a hit with the kids!  One lesson learned: I put out "cookie sticks" from JoAnn to use to pick up and dip the mini-cupcakes, but the cupcakes ended up falling off of them easily and forks worked better... perhaps a thinner stick next time?


The birthday girl even had a super-sweet cupcake dress to wear for the party (thanks, Grandma!).  I'd say the party was a great success!!


I had enough paper leftover from the invitations to make these coordinating thank you cards too!


What are your secrets for planning a cute and fun birthday party on a dime?

This post is linked up to the following parties:

Show Me Extraordinary @ The 36th Avenue
Hookin Up HOH @ House of Hepworths
Delightfully Inspiring Thursday @ Delightful Order
Flaunt it Friday @ Chic on a Shoestring Decorating
Inspiration Friday @ At the Picket Fence 
The Sundae Scoop @ I Heart Nap Time
Sunday Showcase @ Under the Table and Dreaming
Motivate Me Monday @ Keeping It Simple
Link Party @ Polish the Stars 
One Project at a Time @ A Bowl Full of Lemons
Simply Sensational Tuesday @ Organized Homelife
Overflowing with Creativity @ It's Overflowing
The Creative Spark @ Clean & Scentsible 
Whatever Goes Wednesday @ Someday Crafts 
Make it Pretty Monday @ The Dedicated House


Friday, June 22, 2012

The Path to Our Dream Home: Master Bedroom

Today we continue the Path to Our Dream Home series with our master bedroom.  To catch up, you can visit these posts: Back to the Beginning, the Main Bath, the Guest Bath, the Utility/Storage Room, the Media Closet, the Nursery, and the Little Girl's Room.  Each post tours the space in photographs, and shows how we work a lot of organization and function into each room of our small house.  There are many project ideas for each room, so none of them is ever "done", but they are all on the path to our dream home!

I absolutely LOVE my master bedroom.  I think a master bedroom should be an oasis from all the chaos of life.  The colors, furniture and layout in our master combine for a look that is very soothing to me.


As I discussed in an earlier post, six inch bed risers give us an amazing amount of storage under our California King bed.  With the furniture in its current arrangement, the large headboard covers up the bottom half of the small second window in the room.  When we arranged the furniture this way, I thought for sure I would hate the bed covering the window, but I don't actually mind it at all.  Does anyone else cover up a window with furniture?


This cane rocking chair that belonged to my husband as a boy is very special to us.  We want the kids to use and enjoy it, but it is delicate and is still a hazard for my one-year-old that is learning to walk.  This spot in our bedroom provides the perfect environment to keep it safe, but still have it out.


The closet has an organizing system that divides the rods on either side with a stack of drawers and shelves to provide storage for clothes and shoes.  Since I only have two long dresses (one of which being my wedding dress), we have double rods on both sides of our closet, providing plenty of hanging space for me and my husband.  Since our bathroom is small and lacks storage and counter space, I use one shelf of the closet to house toiletries.


Between our dressers and closet, as well as some containers under the bed for off-season clothes, we are able to neatly store all of our clothing in our bedroom. As for entertainment in the bedroom, we are able to access the full library of movies and videos and watch internet television via a laptop connected to our network.  For more details on how we organize our media, read this post on our Media Closet.

As in every room in the house, I have projects in mind for this room, so I'm sure we'll revisit this space!

This post is linked up to:

DIY Project Parade @ DIY Showoff
The Sunday Showcase Party @ Under the Table and Dreaming
The Sundae Scoop @ I Heart Nap Time
Motivate Me Monday @ Keeping It Simple
Overflowing with Creativity @ It's Overflowing
Metamorphosis Monday @ Between Naps on the Porch 
Simply Sensational Tuesday @ Organizing Homelife
One Project at a Time @ A Bowl Full of Lemons
Home Decor and Organizing Party @ organize & decorate everything
The Creative Spark @ Clean & Scentsible
Whatever Goes Wednesday @ Someday Crafts 
Show Me Extraordinary @ The 36th Avenue
Hookin Up HOH @ House of Hepworths
Delightfully Inspiring Thursday @ Delightful Order
Transformation Thursday @ Shabby Creek Cottage
Flaunt it Friday @ Chic on a Shoestring Decorating
Inspiration Friday @ At the Picket Fence
Fridays Unfolded @ Stuff and Nonsense
Weekend Bloggy Reading @ Serenity Now

Thursday, May 24, 2012

Organizing a Fundraiser - Part 2, Bringing it Together


My good friend Jeni that was diagnosed with stage 2 breast cancer at 39 years old this past September is completing her last radiation treatment today!  I'm overwhelmed with joy that the toughest part is over!!

Back in February and March we held a couple of big (for us) fundraising events to help her as much as possible to pay for all the out-of-pocket expenses she faces so she could focus on getting through treatment and getting healthy.  I learned so much about organizing a fundraiser for an individual's medical expenses, and there wasn't one great source for all the information I gathered, so I thought I'd share some thoughts to hopefully help others in this endeavor.

Part 1, Getting Started was posted before the main event.  At that time, I had really learned a lot, but since the events are behind us now I am better able to really give some advice.  In this second post about Organizing a Fundraiser, I will describe how to bring all the planning together to execute a successful event, as well as make a few comments on things that worked well, and things that could have been better. You can read about our fundraiser specifically at helptheharrisfamily.blogspot.com.

We focused on one main event, a "Pizza Fun Night" at a local Round Table Pizza (more on this in a moment).  We had a raffle, a silent auction, and a bake sale AT the event as well, which were all put together from donations from friends and family and the community.  This is where we left off last time, so we'll start with tips on asking for help from the community.


Ask for Help

We put together a template letter that, on one page, gave a little back story about our friend and what she was going through, and then requested any donation the business could make, and indicated that we would put their logo or business name on as many marketing materials as we could.  We included the logo seen above for our fundraiser (part of our "branding" strategy that I discussed in the first post), as well as logos for all the businesses that had already donated something (nothing wrong with a little peer pressure!).

We divided the target businesses among three committee members (we each did about twenty letters or so).  If we didn't know, we contacted the business to find out who would be responsible for making a decision about a fundraiser donation.  Then we addressed each letter directly to that person.  Each of us included our own contact information on the letters we distributed (so that each business had one go-to person).  We specified in each letter a specific date on which we would follow up. 

We mailed a few letters, but personally delivered most of them.  We started with businesses to which someone in our planning group had a personal connection (other folks helping with the event also reached out to their connections), then we branched out to major names (large and small) in our community.  I was BLOWN AWAY at the response and support we got! We ended up with over seventy raffle prizes, and over twenty items for the silent auction!

A few observations...

Raffle AND Silent Auction  We decided to do both a raffle and silent auction when we started receiving some donations that were pretty specific in terms of who might be excited to receive the item.  For example, we got a full 1 year membership to a specific location of Curves donated (soooo awesome!), but the winner would have to be a female that is able to go to that location, so we thought that would be a perfect silent auction item, but not so great for a raffle.  And we divided all the donations between the raffle and auction with similar criteria.

You are NOT Alone  It became extremely clear that there are TONS of fundraisers for many different causes going on at any one time.  The bigger the business's name, the more requests for donations it receives.   Constantly.  I had been told that large companies and chains (with deeper pockets) would be more apt to donate for our raffle.  I found the EXACT OPPOSITE to be true.  We got a few donations from major chains, almost exclusively when someone in the group had a significant connection at the business.  BUT, a lot of this may have had to do with the timing of our event.  We planned and executed our event from start to finish within about 7 weeks.  A few of the chains let us know that they have committees that meet and discuss donations at certain times.  For Costco, we might have gotten something had we approached them at least 90 days in advance.  Target and a few others meet every six months to consider donations.  Best Buy and a few others meet monthly.  If donations from these types of stores are important to you, it will need to affect your timeline.  But we found small, local businesses to be very generous.

A BIG Donation really helps  A friend that was involved in planning the events donated his timeshare, a week-long stay at a Beach Resort villa in Cabo San Lucas, worth over $2000!  As you can imagine, this prize had a major impact on our raffle ticket sales, and created quite a buzz with folks at the event and on Facebook.  Especially because I could post photos like the one below from the resort!

{Photo Source}
We sold raffle tickets in advance and at the event.  They were $2 each or 3 for $5.  We sold more than I expected in advance (the most successful were those of us that work at places with lots of people around), but we sold even more at the event with the buzz about Cabo, and the raffle was the most significant part of the money we raised, by several fold.

Silent Auction: Beyond the Event  We decided to post the items for our silent auction on Facebook and start the auction on Facebook a few days in advance of the event, and to continue the auction during the event both live at Round Table Pizza and on Facebook, for those from out-of-town or that couldn't make it down.  I photographed each item and edited a "card" with the image and information on each item to upload as a single photo to Facebook.  Then people made bids via commenting on the photo.  We sold at least half of the items via Facebook.  It was a bit tricky for me during the last few minutes of bidding, but the timestamps of comments posted on Facebook helped.  I definitely recommend verifying that your event location has a WiFi connection you can use prior to doing something like this.

Advertising

Flyers I created flyers with my image editing software that included our branding, and information about the event and all of its activities, as well as kudos to all of our sponsors and other ways to make donations.  We posted this flyer at as many businesses around town as we were able.


Social Media  As I mentioned in the first post, I created a blog and Facebook page for the Help the Harris Family fundraiser.  We shared updates on events and how Jeni was doing via these media.  Everyone connected with the fundraiser shared update posts about the event, the raffle prizes, the silent auction items constantly in the week or so leading up to the event to spread the word.  

Newspaper   We submitted a press release to the local newspapers.  The press release was a concise version of the back story and event information adapted from the letter we gave to businesses, along with a headline.  We followed up to make sure the local paper would run a story or ad about our event.  They listed our event in their community events section, and they also had a reporter write a story about the event.  It was a large story and included a version of the flyer - so awesome!!  I know that some people were at the event, and tuned into the silent auction on Facebook, because of this promotion specifically.

Radio   Two different people in the greater planning group had contacts in the radio world in our area, so we sent our press release out via those people, but we didn't really follow-up directly and I regretted this in the last few days before the event.  I have no idea if we were ever mentioned on any radio stations...  So I would recommend arranging an introduction, instead of completely delegating something like this, so you maintain the ability to follow-up, because follow-up was really key in everything we did.

Television   In our community, there is one news station that features community groups on the air to promote events, so we submitted our press release and contacted them several times.  We were able to list our event on their community events website, but the TV spots seemed to go by a lottery system (or if you knew someone probably), so we never made it on the air. 


The Event was a HUGE Success!

The Pizza Fun Night was an amazing success.   Due to our promotions, we had that restaurant busting at the seams for a full 2 hours of our 4 hour window.  It was amazing.  They were calling in all available employees, and I heard it was the restaurant's busiest Monday night ever!

We were able to help with a small but significant chunk of the Harris Family's medical expenses, and I know that was huge for them.  Jeni's family also planned two events (a pancake breakfast and raffle) at the Moose Lodge in her hometown, and as I understand it, those were pretty successful too!

While I wish we could have raised all the money they needed, I know that every dollar we raised is a about 75 cents they don't have to worry about (after taxes), and I am SO glad we did it, because they certainly deserve all the help!!! 


A Note about the Round Table Pizza Fundraiser Program

We were definitely grateful to be able to work on all the above parts of the event, rather than worry about venue and food planning, so we have no regrets about hosting the event at Round Table Pizza.  However, we didn't find out until the day of the event that folks using coupons would have a direct impact on the portion of sales we received.  For example, we were set to get 20% of the proceeds from all non-alcohol sales.  So if someone bought a pizza for $10, we would get $2.  But what we didn't know in advance, was that if that same person used a $2-off coupon, we would get nothing from that sale.  I strongly advise that if you take advantage of a fundraising program at a restaurant like we did, that you ask specifically in advance how coupons will affect you.  Had we known, we might have been able to at least put a message out on Facebook for everyone we knew to let them know that they should save their coupons, if they were able.

All-in-all, the money we raised from Round Table was tiny in comparison with the other events we held there.  We were surprised when we heard the final amount, given how ridiculously busy they were (people were waiting close to two hours for their food at one point) that we had raised so little, and they said there were a lot of coupons used.   But I reiterate that we really wouldn't have gone any other way (except maybe to see if the other local restaurants that had similar programs might not have had this coupon rule). 

This post is linked up to the following link parties:

Home Decor and Organizing Link Party @ organize & decorate everything

Weekend Bloggy Reading @ Serenity Now

Monday, May 21, 2012

May Blog Networking Blog-Hop

I am participating in this awesome Networking Blog Hop to introduce folks to new blogs, and to introduce my blog to others!  It is co-hosted by a lovely blog that I follow, At the Picket Fence.

May Networking Blog Hop
Click on the link to view the long list of awesome, awesome blogs!

Have a great week!!
Related Posts Plugin for WordPress, Blogger...