Subscribe to Follow this Blog

If you like what you see, please subscribe to follow along either in a Reader or by email!

Monday, October 22, 2012

{Garage Sales Rock} Electronics Learning Stations

My husband is a mechanic, and could have been an engineer if he had wanted to; he thinks in physics-speak.  His brain soaks up all things electronics, and he has been waiting for Alyssa to be old enough to get an electronics learning station and go over all things electronics with her.  The stations costs like $60 brand new, so I've been on the hunt for a good sale.

A few weeks ago we made the rounds ("adventuring") to a few garage sales with the kiddos and stumbled upon a garage sale hosted by a guy with a similar electronics bug.  And voila!, 3 electronics learning stations, each marked $3.  The guy said they were each missing a few parts, so he sold all 3 to us for $3!  I cannot say enough how much I heart garage sales!!
I never knew these things existed, but they are pretty neat!  I'm pretty excited that my daughters will know how to operate a DVOM (digital volt and ohm meter) at a young age and get a head start on physics while spending super-quality time with Daddy!! 


Sunday, October 7, 2012

I Was Nominated for the Liebster Award!!


The Liebster Blog Award is given to bloggers by bloggers. It is a way to acknowledge each other and say “you’re doing a great job”. It is for blogs with 200 or less followers, so it’s also a great way to spread the word about smaller blogs and get them more readers and followers! When you receive the award, you post 11 random facts about yourself and answer 11 questions from the person(s) who nominated you. You pass the Award onto 11 other blogs (make sure you tell them you nominated them!) and ask them 11 questions. You’re not allowed to nominate the blog(s) who nominated you! (To get the button, right click the picture on my page and save the picture to your computer. You can then upload to your blog.)

Thank you so much to Melissa at Adventures with Captain Destructo for nominating me for this award!  I really appreciate it.  Her blog is super awesome, too!!

Random facts about me:
  1. I was so shy as a little kid that I could hardly talk sometimes, and I'm still pretty shy around new people.
  2. I am super proud of the fact that I got to mosh with my husband at my wedding reception.
  3. I LOVE salads, but don't like lettuce on sandwiches; I even order BLTs minus the L.
  4. I would LOVE to be on Wheel of Fortune, but fear I am only good at the game from my own house (see #1).
  5. I play fantasy football and generally know more about sports than my husband.
  6. I draw a blank for a super long time when asked for 11 random facts about myself.  This part is taking me WAY too long to complete!
  7. I played baseball with the boys as a kid, never softball.
  8. I have an obsession with tomatoes and eat them nearly every day.
  9. I have a master's degree in biology.
  10. I have a pet peeve about grammar and I'm always finding typos in advertisements and books.
  11. I had an aversion to pink until I had a daughter (and then another one!) and now I tolerate having pink things in the house.
I am nominating the following wonderful blogs for this award. 
  1. Holli @ Full Hands Full Hearts
  2. Meredith @ Mom of the Year
  3. Erika and Rowena @ Homestead Simple
  4. Jennifer @ Mommy Huh
  5. Christine and Janene @ More Than Mommies
  6. Raquel @ Organized Island
  7. Ashley @ Ashley's Homemade Adventures
  8. Taryn @ Design, Dining and Diapers
  9. Mrs. Accident @ The Accidental Housewife
  10. Lanaya @ Raising Reagan
  11. Laura @ Real Momma

Questions I Was Asked:
  1. What is your favorite food?  Pizza and Ice Cream run neck and neck.   
  2. What is your dream job?  Part time Quality Assurance consultant for Medical Devices and part time stay-at-home Mom.  Really I have this, it's just that the part time Quality Assurance is a little too part time right now; I need another client or two to make it the dream... 
  3. What did you want to be when you were a little kid?  A doctor.  I love science and before college, I didn't realize how many ways you could use a science education.   
  4. What was your favorite book as a kid?  The Boxcar Children.  I can't wait to read that with my girls! 
  5. What is your favorite color?  Black
  6. What season is your favorite?  Spring, because I love the nice weather and anticipation of fun summer activities, but I like many things about all of them. 
  7. What is your favorite holiday?  Now that I have two little ones, Christmas.  I love watching them be so excited about it and getting together with family. 
  8. If you could have one day to do anything, what would it be?  I would love more time with all of my family doing something fun together.  Owning businesses is not always conducive to dedicated family time with both me and the hubby.   
  9. Which chore would you rather do, dust, grocery shop, or laundry?  Definitely laundry.  There is something soothing to me about the orderly folding and putting away of clean clothes or linens.   
  10. How many kids did you think you would have as a child?  Two.  And I was convinced I'd name them Christian and Shelby.  How silly was it to be so convinced I'd like those names as an adult?? 
  11. What do you look forward to most about fall?  Now that summer is winding down, I look forward to the weather getting cold enough for a fire in the wood stove. 
Questions for my Nominees:
  1. Why do you blog?
  2. Does the scope of subject matter and target audience of your blog today match what you envisioned when you started?
  3. What was your favorite book as a child?
  4. What is your favorite season?
  5. Is form or function more important to you?
  6. If you could have one day to do anything, what would it be?
  7. If you use a smartphone, what app can you not live without?
  8. What is your favorite board game?
  9. Would you rather have a maid, a personal chef, or a gardener?
  10. What is the most organized room in your house?  
  11. What qualities of you do you see in your children?

Friday, August 24, 2012

Thank You - 10,000 page views!!

I want to say a quick THANK YOU to all of my readers and followers!  My blog has grown so much in the past few weeks and I am blown away and giddy about it!

{Image Source}
At the New Year, I made what I thought was a lofty goal of hitting 10,000 page-views by the end of 2012, and thanks to all of you, I have just passed that milestone several months early!!   Here's to hoping I can hit 20,000 by the end of the year now!!

Polk-A-Dot Letters

My sister-in-law snatched up these letters when she found them at the dollar store!  I still can't believe these letters were only a dollar a piece!!  Then it was very lucky that I hadn't gotten around to painting them to match the nursery, because we decided to move the girls in together and I avoided needing to repaint them.  See, procrastination pays!!  :P


I decided I wanted to do something fun with the paint for this project and decided to try some polk-a-dots.  First, I painted the letters the polk-a-dot color: pink for the Z and E and yellow for the O. 


After that paint dried, I used pennies from our coin jar to make the polk-a-dots.  I set them out on the letters in a random pattern and painted all 3 letters with green (all the paint was spray paint).


After about 20 minutes, I very carefully used my Cricut pick tool (looks like a dentist's pick) to pick up all the pennies and then let then let them set  so the paint dried completely.  Then I added a little something extra by hot-gluing some fabric flowers and rhinestones onto each letter (which also allowed me to bring in the other colors from the room).


I think they look super cute against the lavender walls and this was a very budget friendly project!!


Now the girls each have their name represented on the walls of their shared room.  Pretty soon I'll show you how the "final" room came together!

This post is linked up to the following link parties:

Weekend Bloggy Reading @ Serenity Now 
Pinteresting Link Party @ Here's to Handy Andy 
Overflowing with Creativity @ It's Overflowing
The Sundae Scoop Link Party @ I Heart Nap Time
Manic Monday Linky Party @ Serendipity & Spice
Sharing Time @ Raising Memories
Monday Mom Musings @ Jellibean Journals 
Motivate Me Monday @ Keeping it Simple
The Sunday Showcase Party @ Under the Table and Dreaming
Make It Pretty Monday @ The Dedicated House 
Link Party @ Polish the Stars 
Simply Sensational Tuesday @ Organizing Homelife 
Tutorials & Tips @ Home Stories A to Z
Terrific Tuesdays @ The Adventures of a DIY Mom
One Project at a Time @ A Bowl Full of Lemons
Frugal "I Did It" Tuesday @ Off The Grid at -30
Power of Paint Party @ Domestically Speaking 
Home Decor and Organizing Party @ organize & decorate everything
The Creative Spark @ Clean and Scentsible

Wednesday, August 15, 2012

Organized Diapering Part 2: Our System

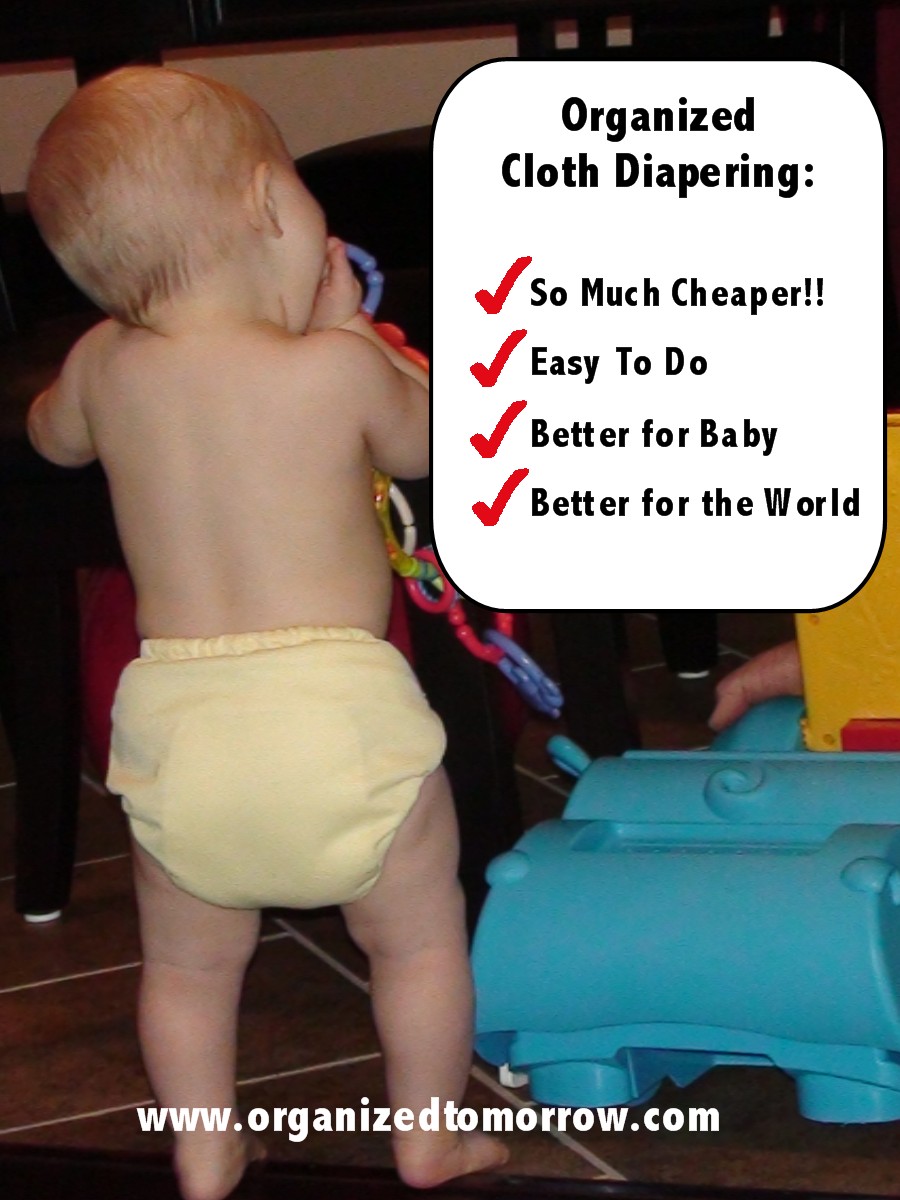
Now that I've discussed how and why we chose cloth diapers, as well as some basics of starting with cloth diapers in Organized Diapering Part 1, I'll get to the details of our system for cloth diapering today.

We use the Tiny Tush Elite One-Size diapers, each of which comes with a water-proof diaper cover, a small (infant) insert, and a longer (large) insert.  The tips listed here apply to these diapers, but they may apply to other types/brands of diapers as well.  We have a total of 28 diapers now, and daughter # 2 is going on 15 months of use.


When baby is tiny, use the small insert and snap the sizing snaps (3 rows of snaps along the front of the diaper cover) to the bottom row to fit your little one.  Move up to the next row when the diapers start to get a little tight.  Below is the diagram of how the snaps are laid out on the Tiny Tush diapers we use.


Of course I didn't pay too much attention to the point at which this next transition took place, but somewhere around when we started solid food I think, we started using BOTH the small and large inserts in each diaper.  We continue this way until baby is potty trained.  This has always worked best to prevent leaks, especially at night.  Come to think of it, the transition may have been around the time she started sleeping through the night, about 3 or 4 months old. 

Cloth Wipes Too

We use the plainest of plain cotton baby washcloths for our wipes.  The flushing bottle I got for self-care after delivery of daughter # 1 makes the perfect water bottle for the diaper station.  Just squirt a little water on a clean wash cloth and you have the most gentle, chemical-free wipe you could expect!  Just toss them in the wash with the diapers and re-use!


Two things about this are worth mentioning.  We purchased baby washcloths with a wrapped edge for use in the kitchen to distinguish the washcloths in case one is found laying around the house.  Because even though the ones used for wipes are clean, it still feels better to keep them segregated.

Second, because we use plain water on our wipes, sometimes baby's bottom is a little wet after cleaning.  Most of the time a little fanning with the clean diaper is all you need to dry the bottom, but sometimes it doesn't happen fast enough.  For this purpose we also keep a roll of Viva paper towels at the changing station.  Viva are by far the softest paper towels, and this works better then another washcloth for getting baby very dry before a clean diaper. 

Diaper Station

Part of the system we have for diapering has to do with our diaper changing station.  We try to replicate as much of the system as possible in the diaper bag for easy changing on the go. 

At home, we use a wire basket to wrangle all the cloth wipes, water bottles, paper towels, and coconut oil (more on this in a few minutes) and keep them within reach. 


Maybe I'm nuts, but I have never once used the straps to strap down either of my children to the changing pad.  I understand the manufacturer is required to put the straps there, but they just sit underneath our changing pad.  BUT, the changing pad is a little slick, and since we just set ours on top of the normal dresser in the nursery, I use the bumpy shelf liner/rug pad material cut to the size of the changing pad to make it stay put.  It works like a dream!!


In the diaper bag, we use a large Planet Wise wet bag I got at my local Eco in Chico to keep all the soiled diapers until they can be "dealt with" and put in the diaper pail at home.  The bag can be washed and dried and is just awesome!


A Little Hands On 

Once you are past the meconium stage, but before solids, you don't really even need to do anything but toss the diapers in the wash after baby poops.  As soon as the poop gets a more solid consistency, or there are chunks of solid food, the poop should be disposed of in the toilet prior to washing.  We keep our diaper pail in a bathroom and take the diapers straight there after changing, eliminate any poop in the toilet and toss the diaper and wipes in the pail until the pail is full. With our 28 diapers, as soon as the pail is full, it is time to wash diapers to ensure we always have plenty of clean, dry diapers at the ready.

They make sprayers that you can hang near the toilet and tap into the toilet's water source to spray the diapers out, but I've never found much more than a couple of repeated dunks in the toilet water necessary to remove the chunks enough for washing.  The sprayer seems like it would be a magnet for toddler play and mess-making more than a useful cleaning tool, but to each his own.  I have never tried it.

It has never bothered me to get my child's poop on my hands during this process and then wash my hands well after the diaper goes in the diaper pail.  As an alternative, a pair of rubber kitchen gloves dedicated to this purpose work quite well for my mother-in-law, who watches my daughters regularly. 

Laundering

The diaper pail lives next to the toilet in the guest bathroom.  In a complete stroke of luck, as soon as the 8 gallon diaper pail we use is full, it is time to wash diapers to ensure we always have plenty of clean, dry diapers at the ready.  If I wait until it is completely overflowing, or I have a separate bag full in addition to a full diaper pail, I am in danger of running out of diapers before the load is clean and dry. 

A normal wash cycle consists of a cold-water rinse, followed by a hot water wash.  Since my tank-less hot water heater allows me to select the hot water temperature (as I have mentioned before), I am able to wash my diapers in 140 degree F water and then turn the water heater down for baths (which I love!).  No soap or anything for the first rinse, and I use a full scoop (which I'd estimate to be 2 Tablespoons) of Charlie's Soap for each wash-load, although the diaper manufacturer says you can use less soap with good results.  Although not directed by the diaper manufacturer, I also fill the fabric softener dispenser in my washer with white vinegar and then add an extra rinse to every cycle.  I'll go over the reasons that this has been an awesome addition to our system with daughter #2 in the next section.

When the diapers are brand new, it is best to put them through 2 full rinse and wash cycles to help the inserts gain absorbency and get them ready for baby.  

After washing, I hang the diapers and wipes on the dry rack to dry.  The inserts CAN go in the dryer, but they maintain their absorbency much better when they air dry.  Here in the Northern California foothills, during the hot part of summer, the diapers will dry in a few hours outside in the sun.  Likewise, in the cold part of winter, the diapers will dry in a few hours hanging by the wood stove.  During the spring and fall, they can take a little longer to dry, maybe a whole day, unless they can sit in a room under a ceiling fan on high.  For reasons explained in the next paragraph, I let mine dry outside whenever the weather permits.


When I put the diapers together after they dry (I like them to be ready to throw on baby), I always orient the inserts the same way, positioning the tags at one end of the inserts to face each other, with the large insert on the outside of the diaper cover (closest to baby's bottom).  That way any staining that may occur from poop is always on the same side of the longer inserts, and I just hang them with that one side facing up in the sunshine to let the sun fight the stains, since you can't use bleach or any other chemical stain remover with the diapers. I must say the sun is a pretty amazing stain-fighter!

Diaper Rash

Cloth diapers and traditional diaper creams do not get along.  Although they say with the gentleness of cloth diapers, diaper rash is less common with cloth diapers, I say diaper rashes will happen no matter what.  It is imperative that diaper creams aren't used without a barrier between the cream and the cloth diaper.  Diaper liners are sold by most of the cloth diaper manufacturers.  They provide a sufficient barrier to use diaper cream and protect the cloth diapers.  As an aside, they can also make poop clean-up easier, if you just can't get past that part.

We have used a couple rolls of liners only when baby has diaper rash, but more recently we have discovered the use of coconut oil (we like Dr. Bronner's brand) to combat diaper rash.  The rash seems to clear up just as quickly as with traditional diaper creams, but the coconut oil doesn't harm the cloth diapers in any way!  So this would definitely be my suggestion!!  We put some coconut oil in a re-purposed baby food jar for travel and keep a jar at the diaper station.

{Photo Source}

Stripping the Diapers 

If you do accidentally get diaper cream on the diapers, or you notice that you are having regular leaks, you may need to "strip" the diapers.  Baby's skin does have natural oils that can build up on the diapers and prevent them from being properly absorbent.  The stripping process goes as follows:

  1. Run the diapers through a rinse cycle like normal.
  2. Wash the diapers in hot water (should be ~140 degrees F if possible) with 1/4 cup dish soap (I use Ajax lemon - I'm told the stripping may not work as well with an all natural dish liquid; you want that strong degreasing capability).
  3. Run a rinse cycle with 1/4 cup to 1 cup of white vinegar.
  4. Run two more rinse cycles with nothing added to rinse the diapers thoroughly.  
  5. Air dry and use as normal.
In the case of visible diaper cream remaining on a diaper cover, you may need to scrub the diaper with a bathroom tile scrubber and dish soap until you can't see the diaper cream anymore.  Then run through the stripping process.  This is why it is better not to use traditional diaper creams without at least a liner,  but I had a few diapers that were like this after daughter #1, and I cleaned them in this manner and have used them for daughter #2 with no leaks or problems. 


The addition of vinegar to the rinse cycle of every wash-load has made a big difference in the frequency with which I have had to "strip" the diapers with daughter #2 (and the SAME set of diapers!). That is to say I've stripped them only once, at about 11 months.


Have I forgotten anything??

This post is linked up to the following link parties:

Delightfully Inspiring @ Delightful Order 
Mommy Brain Mixer @ Two in Diapers 
Hookin up with HOH @ House of Hepworths 
Keep Calm & Party On @ Becoming Martha 
Fantabulous Friday @ Little Becky Homecky 
Flaunt it Friday @ Chic on a Shoestring Decorating 
Weekend Bloggy Reading @ Serenity Now 
Manic Monday @ Serendipity & Spice
Overflowing with Creativity @ It's Overflowing
The Sundae Scoop @ I Heart Nap Time
Link Party @ Polish the Stars
Motivate Me Monday @ Keeping it Simple
Tutorials & Tips Link Party @ Home Stories A to Z
Simply Sensational Tuesday @ Organizing Homelife
Terrific Tuesday @ Adventures of a DIY Mom 
The Sunday Showcase @ Under the Table and Dreaming 
Frugal Days, Sustainable Ways @ Frugally Sustainable 
Home is Where the Heart Is @ Homestead Simple 
Home Decor and Organizing Party @ organize & decorate everything
The Creative Spark @ Clean & Scentsible 
Whatever Goes Wednesday @ Someday Crafts 
Simply Natural Saturdays @ The Pistachio Project

Saturday, August 11, 2012

Surviving Summer Pot Lucks: Grilled Veggies!!

The summer months bring with them plenty of gatherings that challenge my willpower to stick with a healthy diet.  Pot lucks are fraught with a tempting selection of chips and dips, high-carb salads with potatoes or pasta, and sweets galore.  This year, I've managed to get through several parties without indulging by bringing a medley of grilled veggies each time.  Paired with some grilled chicken or tri-tip and a nice green salad, we avoid temptation by avoiding hunger.

To make this particular batch, we cut up a selection of veggies including bell peppers, onions, zucchini, yellow squash, and mushrooms.  Any combination of veggies you like will do!  In a large bowl, we toss the cut veggies with some grapeseed oil, crushed garlic, salt, and pepper.  For this batch, my husband tossed in some sunflower seeds as well - yummy!

 
We use this grilling basket on the BBQ to grill the veggies.  My husband usually takes care of the grilling, so I got these details from him.  He starts with them on a hot flame, stirring to sear the edges.  After the veggies sear, he turns the flame down so the temperature comes down to ~400 degrees F.  He adds a layer of tin foil under the grilling basket to catch the juices and achieve a steaming effect by cooking them with the grill closed until they are done (for this batch it was another 30 - 40 minutes, but would depend on the grill and the size of the batch, of course). 


When taking these to a pot luck, we grill the veggies ahead of time, then keep them warm by making a foil packet big enough to contain all the veggies after they're cooked.  We put the foil packet full of veggies inside a small baking sheet.  When we arrive at the party, we can reheat the veggies if necessary, open the packet, and add a serving spoon.  Super easy, soooo yummy, and wonderfully healthy!

How do you stick with your healthy eating plan away from home??

This post is linked up to the following link parties:

The Sundae Scoop @ I Heart Nap Time 
Make it Pretty Monday @ The Dedicated House 
Link Party @ Polish the Stars 
Tutorials & Tips Link Party @ Home Stories A to Z 
Simply Sensational Tuesday @ Organizing Homelife 
Home Decor and Organizing Party @ organize & decorate everything 
The Creative Spark @ Clean & Scentsible 
Home is Where the Heart Is @ Homestead Simple 
Whatever Goes Wednesday @ Someday Crafts

Wednesday, August 8, 2012

Inspiration from Pinterest: No-Mess Art Project

Pinterest is great for all kinds of inspiration.  As incentive for me to actually put some of these great ideas into practice, I'll post about things I've replicated or modified from something pinned on one of my Pinterest boards.

We are in the middle of a stretch of summer here in Northern California where some afternoons are just too hot to go outside.  And with several wildfires burning in the area, the mornings are super-smoky.  That makes for a long day inside for my daughters - currently 15 months and almost 4 years old.  Boredom leads to many timeouts in my house, so I love Pinterest for boredom-busting ideas.

I was thinking this no-mess art project idea would be perfect for my 15 month old, who loves to finger paint.  Finger paints are sealed in a baggie and attached to a sliding glass door at a convenient height for toddler play.  With the light from outside coming through, the colors are brighter and you can really see when you write or draw shapes in the paint, but I'm sure it would work if they were attached to a wall or table-top also.

In reality, my 15 month old Zoe just wanted to rip the baggie off the sliding glass door and check it out.  But the almost 4-year old loved it, so I moved both bags high enough on the window for Alyssa.  It is still entertaining for Zoe because she enjoys watching her sister.

I squirted paint from several different colors into two quart-sized Zip Lock bags, sealed them up and taped them to the inside of the sliding glass door.


I left them up on the window after the girls lost interest that day to see how long they might last.  I took this picture after 17 days on the window, and while all the colors have mixed together, they still work for finger painting and drawing letters or shapes (in fact they are still there today!)!


What simple, mess-free activities do you have in your boredom-busting arsenal?

Linked up to the following link parties:

Hookin up with HOH @ House of Hepworths
Mommy Brain Mixer @Two in Diapers
Delightfully Inspiring Thursday @ Delightful Order 
Blog Link Party @ Somewhat Simple 
I Freakin Did it Friday @ Miss Information
Fantabulous Friday @ Little Becky Homecky
Weekend Bloggy Reading @ Serenity Now 
The Sundae Scoop @ I Heart Nap Time 
Link Party @ Polish the Stars 
Tutorials & Tips Link Party @ Home Stories A to Z 
Simply Sensational Tuesday @ Organizing Homelife 
Home Decor and Organizing Party @ organize & decorate everything 
The Creative Spark @ Clean & Scentsible 
Home is Where the Heart Is @ Homestead Simple 
Whatever Goes Wednesday @ Someday Crafts 
Momma Mar's Activity Corner 
Manic Monday @ Serendipity & Spice

Friday, July 27, 2012

Olympics Opening Ceremonies Meal: Low-Carb Shepherd's Pie

We are having an impromptu gathering to watch the Opening Ceremonies for the Summer Olympics tonight.  I wanted a traditional British meal that would fit with our South Beach diet.  Cooking Light magazine has a selection of lightened up traditional British recipes, but none of them is exactly low carb.  But with a few modifications, I'll be making low carb Shepherd's Pie and I think it should be super yummy!
 
{Source}

The Cooking Light Shepherd's Pie recipe uses packaged mashed potatoes and a little added sugar in the ground beef mixture.  For my version, I will prepare mashed cauliflower, and omit the added sugar. 

To prepare mashed cauliflower:

Steam one bunch of cauliflower (about 45 minutes or until desired doneness).  Puree cauliflower with approximately 1/4 cup of softened butter or butter substitute.   Add half and half or skim milk gradually until you get your desired consistency (probably about 2-4 Tbsp.).  Salt and pepper to taste.

Then I'll follow the Cooking Light recipe below, but use the cauliflower mash instead of potatoes and omit the sugar.

  • 2 cups prepared mashed potatoes (such as Simply Potatoes)
  • 3/4 pound ground sirloin
  • 3/4 cup picante sauce
  • 1/3 cup water
  • 1 tablespoon ground cumin
  • 2 teaspoons sugar
  • 1/8 teaspoon salt
  • 1 (15-ounce) can kidney beans, drained and rinsed
  • 1/2 cup (2 ounces) preshredded reduced-fat extrasharp cheddar cheese $

Preparation

  1. Prepare mashed potatoes according to package directions; keep warm.
  2. Cook beef in a large nonstick skillet over medium-high heat until browned, stirring to crumble. Stir in picante sauce, water, cumin, sugar, salt, and beans; bring to a boil. Reduce heat; simmer until mixture thickens (about 5 minutes).
  3. Remove from heat. Spoon mashed potatoes over meat mixture, and sprinkle with cheese. Cover and let stand 2 minutes or until cheese melts.
Note: Prepared mashed potatoes are found in the refrigerated section of larger grocers. They only need a few minutes in the microwave to reheat.

Here is how our version turned out, paired with sauteed green beans.


Enjoy the Olympics!!

Monday, July 23, 2012

Quick Handmade Healthy Gift: Curried Lentil Soup in a Jar

We recently got a last minute invitation to celebrate the 21st birthday of a health-conscious vegan guy in our family, so I immediately thought of this recipe for Curried Lentil Soup in a mason jar I had seen on Good Housekeeping's website last year.

Since the ingredients are almost all pantry staples, and I always have extra jars on hand, it was a breeze to put this together quickly before the party.  The recipe gives instructions for two jars worth; I cut the recipe in half to make this. Isn't it gorgeous?!?!


Recipe

8 ounces Red Lentils
1 1/2 teaspoons Salt
3 Tablespoons Dried Onion
1 Tablespoon Curry Powder
1/2 teaspoon Garlic Powder
8 ounces Green Lentils
1/2 cup Dried Apple Pieces (~1/2 inch each)
1 Tablespoon Parsley

Cooking Instructions

 Place soup mix in 3-quart saucepan with 7 cups water.  Heat to boiling on high.  Reduce heat to low; cover and simmer 20 minutes, stirring occasionally.  Makes 8 cups soup.

To Make Jar:

Layer the ingredients in a quart mason jar in the order listed above.  Vacuum seal jar if desired.

I typed up the cooking instructions, along with what was in the jar (so he can make this over and over!) and attached them to the front and back of a piece of card stock.  Then I put a grommet through the card stock with my grommet tool and attached it to the jar with some kitchen string.


It turned out beautiful, and was simple, thoughtful, AND budget-friendly!


What are your favorite handmade gift ideas??

This post is linked up to the following link parties:

Tutorials & Tips Link Party @ Home Stories A to Z
Simply Sensational Tuesday @ Organizing Homelife 
One Project at a Time @ A Bowl Full of Lemons 
Home Decor and Organizing Party @ organize & decorate everything
Frugal Days, Sustainable Ways @ Frugally Sustainable
Inspiration Board @ homework
Frugal "I Did It" Tuesday @ Off the Grid at -30 
Whatever Goes Wednesday @ Someday Crafts 
Home is Where the Heart is Wednesday @ Homestead Simple 
Hookin Up with HOH @ House of Hepworths
Delightfully Inspiring Thursday @ Delightful Order
Link Party Thursday @ Somewhat Simple
Fantabulous Friday @ Little Becky Homecky
Inspiration Friday @ At the Picket Fence
Potpourri Friday @ 2805
Flaunt it Friday @ Chic on a Shoestring Decorating
Weekend Bloggy Reading @ Serenity Now 
Simply Natural Saturdays @ The Pistachio Project
Overflowing with Creativity @ It's Overflowing 
The Sundae Scoop @ I Heart Nap Time 
Motivate Me Monday @ Keeping it Simple 
A Pinteresting Party @ Tutus and Tea Parties

Saturday, July 14, 2012

Hummingbird Watching

This year we hung our hummingbird feeder slightly differently than in years past, and it has afforded us continuous enjoyment of the hummingbird pair that frequents our feeder.  We hung the feeder from a nail in the eave and used string and an S hook to drop the feeder down so it sits at about chest height in the stationary part of the sliding glass door.  This allows us to see the hummingbirds very well from right on the deck, as well as from our dining room table.  We can watch the hummingbirds enjoy a treat from inside or outside!

The recipe shown above is adapted from the National Zoo.  I just think hummingbirds are so amazing and beautiful!  And I love to photograph them!!  :) 

UPDATE: After posting this on Facebook, an Ornithologist friend reminded me that it is also important to clean the feeders often.   I should have mentioned that I take mine apart and boil all the parts every time I refill it.  She cleans hers by scrubbing all the parts with soap and water at least once a week. 


I hope everyone is enjoying their summer!  I can't believe how quickly it is flying by!

Thursday, July 12, 2012

Organized Diapering Part 1: Why we chose Cloth Diapers

We have used cloth diapers for both girls, which is awesome on many levels.  First, I have only purchased a pack or two of disposable diapers in each size for travel or back-ups, so I estimate we've saved ourselves thousands of dollars.  I have no empirical evidence, but it just seems to me that a soft cloth diaper has got to be more comfortable than a disposable.  And I am happy to be doing a small part to reduce waste in landfills.  On a side note, all children should be required to take a field trip to the dump to see just how much stuff ends up there forever - it really makes you think about what you throw away!!


Anyway, back to diapering...  With our second daughter, we have noticed that we have the diapering system down to a science.  This, along with other experience from the first child, really made those first few months go smoothly, so I thought I would share.

Before the first baby Alyssa, we got 22 Tiny Tush one-size diapers, which are actually still made in the USA!  They cost about $17 each at the time, and we were able to register for them through a local store, Eco in Chico, so we got some help with the up-front costs.  I just looked up the website to get the link, and the style we chose (linked above) are now only $13 each through the website because they've come out with a 2.0 version (they are currently still $18 on Amazon.com).  We elected to get all snaps because I just can't imagine that velcro could maintain its stickyness after all the washing, especially through multiple children!  As shown in the instruction card below, the rows of snaps along the front make the size adjustable. 
{Source}
Since we knew we'd re-use them for future siblings, we kept the colors neutral and split between butter yellow and sage green.  This was a nice number, but in the early months, I would need to wash them a bit often for my taste (more on this in a minute), so we decided to expand to 28 diapers for the second baby Zoe (we just purchased six more).  The one-size diapers are rated to fit between 8 and 35 pounds.  Alyssa was well over 8 at birth, but Zoe started wearing them at just under 8 pounds and they worked fine.  Alyssa potty trained between 18 months and 2 years, and still wore them at night for another six months or so and we weren't close to outgrowing them. 

My daughter in a Tiny Tush diaper at 18 days old
With both girls, we used disposables until the cord stump came off for two reasons.  First, by this time the meconium is long gone (no one wants to try to clean that tarry stuff out!).  Also, the one-size cloth diapers are a bit large and bulky on a newborn (although they totally work without any more leaking than you might expect with a disposable), so it is difficult to fold them in a way that doesn't catch on the cord stump as it dries (it falls off in 4-5 days or so anyway).  If you give birth in a hospital, the hospital supplies you with diapers until you discharge and sends you home with a bunch too, so you still only need a package or two...

You should probably skip this paragraph if looking at poop bother you (but no, I won't be showing you any!).  :)  The other reason I will always be glad that we used cloth diapers from the start is that having to separate the poop from the diaper into the toilet before washing affords you an opportunity to acquaint yourself with what is a "normal" poop for your child in a way that you might not if you just fold the whole thing up and toss the disposable.  At about 3 weeks old, I started to notice little tiny flecks of reddish black in Alyssa's poop, which turned out to be blood.  The saga of trying to diagnose the problem is the subject of another post, focused on being your child's own advocate and learning that doctors don't know everything.  In the end, because I absolutely refused to stop breast feeding, we found out that Alyssa had an intolerance to milk protein (as well as soy protein, since the two have very similar biochemical structures) and we were able to correct the problem by me eliminating dairy and soy from my diet.  I really believe that since Alyssa didn't have any other symptoms (yet) besides the little tiny flecks of blood in her poop, we may not have noticed until much later if we hadn't used cloth diapers...  Alyssa outgrew the intolerance by the age of one (YAY!).

There are two things to know about cloth diapering (at least these types of cloth diapers)...

First, we were advised by Eco in Chico to use a particular type of soap in washing the diapers and were warned that "normal" detergents might destroy the leak-proof part of the covers over time.  That suggested soap was Charlie's Soap.  I know at least one person to whom the cover destruction happened after using the Costco brand Free & Clear soap, so I have always used the suggested soap for all of our laundry.  Switching back-and-forth and only using the suggested soap for diapers is said not to work because "normal" detergents leave residues in the washer.  I probably will never go back to "normal" detergents after using Charlie's Soap anyway because I happen to love it!  It ends up being a bit more expensive than "normal" detergent, but I am very chemical-conscious, and I buy it in a 4-gallon bucket that lasts well over a year, so I don't mind any small additional cost.  I'm able to get the 4-gallon size through another eco-conscious local store, Cathy's Sew & Vac. I think now there are several options for laundry soap that will work safely, but I've never investigated those.

{Source}
The second thing to know about cloth diapering is that the bulk of the cloth diapers will affect the size of clothing your child wears.  Bottoms will fit at about a size larger than tops, at least until the 2T-3T sizes.  And in our experience for 18 month or smaller clothing, fitted bottoms like jeans are just not comfortable for the child, or they would have to be such a larger size that they'd be way too long.  We have used almost all stretchy bottoms, skirts, and dresses.  Not at all a big deal, but something to think about.

I ended up having much more to say about cloth diapering that I had anticipated, so in the next post on this topic I will show you our diapering system specifically.

Please know that while I welcome the opportunity to be involved in the official review of products, the manufacturers of the products I have discussed today have no idea that I exist, and these opinions are 100% my own and I have in no way been compensated or provided with complimentary test products. :)

This post has been linked up to the following link parties:

Weekend Bloggy Reading @ Serenity Now 
Frugal Friday @ Life As Mom 
Simply Natural Saturdays @ The Pistachio Project 
The Sundae Scoop @ I Heart Nap Time 
The Sunday Showcase @ Under the Table and Dreaming 
Mom's Monday Mingle @ Naptime Review 
Make It Pretty Monday @ The Dedicated House
Simply Sensational Tuesday @ Organizing Homelife
Tutorials & Tips @ Home Stories A to Z 
Home Decor & Organizing Party @ organize & decorate everything 
Frugal "I Did It" Tuesday @ Off the Grid at -30 
Thursday Mommy-Brain Mixer @ Two in Diapers

Wednesday, July 4, 2012

Happy 4th of July!!

I took this picture at fleet week in San Francisco back in 2007, and I still love it.  I hope everyone has a safe and enjoyable 4th of July!! 


Organizing for Weight Loss

My husband and I are both determined to shed a few pounds.  Both of us eat fairly healthily, but over the past few years and two pregnancies, our portion sizes have crept up and, especially in my case, the sweet tooth that sets in after the kids are off to bed (and I'm apparently too tired for willpower) is AWFUL!  And seeing things like this all over Pinterest doesn't help! :)

{Source via Pinterest}

We know ourselves well enough to know that in order to focus on weight loss for a little while, we need a diet with structure and clear rules, but counting every little thing is also difficult and gets annoying (which for us means we are more likely to abandon the rules).  We've both had success on the Atkins diet in the past, before we had kids, but I also wanted a more balanced option that has a maintenance phase (or back to "normal") that is well-aligned with the conscious choices we already make for our kids (such as minimizing refined sugars and processed foods).  Our compromise is the South Beach Diet.

I was actually excited to start, since one of the goals of the induction phase (phase 1) discussed in the South Beach diet book is the elimination of cravings, and that is my biggest challenge.  Plus, since I recently stopped breastfeeding my youngest, I'm choosing to take a more empowered attitude to reclaim my body rather than be saddened by the thought of no longer breastfeeding, perhaps forever (since we aren't sure we're going to have any more...). 

In order to succeed in any diet, it is important to organize yourself, your pantry, and your shopping lists accordingly.  This is the first time we are dieting and feeding children at the same time, so there is no way to eliminate fruits and starches from the house altogether for this first phase during which we eliminate them entirely.  The answer is to stock the fridge with plenty of veggie choices and be prepared, especially with diet-approved snacks (like celery sticks, string cheese, and nuts). 

It is more important than ever to plan out meals when sticking to a diet plan.  I still use my Excel meal planner and shopping list system for planning, with a few modifications.  I have also started planning breakfasts because for the first phase of South Beach the breakfasts all involve eggs.  Luckily it is super easy to make omelets and scrambles with different combinations of vegetables for very different meals that all utilize eggs.  At the same time, for the inevitable night where dinner prep gets started too late to go with the planned meal, I am determined to have enough salad fixings on hand at all times that we can always throw together a yummy salad (without getting bored with the same old salads over and over).

Thankfully my system of washing, cutting, jarring and vacuum packing lettuce makes salad making quick and easy during the week.  I continue to expand my veggie prep to include chopped versions of other veggies ready to go vacuum sealed in jars as well.  I will report on how long they seem to last, although we are plowing through veggies these days (which can't be a bad thing!), so it is difficult to really gauge how long they'll really last, but I'll try to do some experiments! 


I am thrilled to report that just over 2 weeks in and my habit of craving sweets at night is gone, but I still want something sweet and chocolate here and there (I'm still a woman!).  I am not a dark chocolate lover, so I was happy to find this No Sugar Added milk chocolate bar at Trader Joe's.  Just one or two little squares is a satisfying treat.

 
And thankfully I can also find things like this Low Carb Caramel Machiatto Tiramisu on Pinterest that I can't wait to try!!

{Source via Pinterest}

I will use this outlet to spotlight diet-friendly recipes and meal ideas that can translate to any healthy lifestyle, as well as ideas for fitting exercise into a crazy schedule.  Be sure to let me know if you have ideas or questions along the way!

This post is linked up to the following link parties:

Weekend Bloggy Reading @ Serenity Now

Wednesday, June 27, 2012

Sweet Cupcakes: A First Birthday Party

When I found this super cute paper on sale at Michaels, the cupcake theme for my daughter Zoe's first birthday party was set!  I also picked up some glittery silver paper and glitter paints to coordinate.  :)


I borrowed the Sweet Treats Cricut cartridge from my awesome sister-in-law to put the invitations together and had my older daughter Alyssa help me paint the cupcake and candle with glitter paint. I wrapped some glittery pink ribbon around the cupcake wrapper to give it some dimension and texture. 


We had Alyssa's first birthday party at our house, and from that party we learned that our house and yard are just a little too small to have a gathering of more than just a few friends for now.  But our budget didn't allow us to rent a big space or even do something at an activity center (such as a gym, bowling alley, or roller skating rink).  Since the weather is pretty nice around both girls' birthdays (end of May and early September), we luck out and are able to go to a park for our parties.  I'm such a planner that I just have to have a reservation for a party, rather than scoping out a set of picnic benches at the park the day of the party, especially in early June!  I called around to the recreation departments in the area and was surprised to find the local parks in Paradise now charge a fee between $50 and $150 dollars to rent BBQ/party spaces!  Luckily, the super-fun Caper Acres park in Chico still allows reservations in their "birthday rings" for free.  Whew!!  With play equipment for kids of all ages, the only challenge was keeping them together for the party activities.  :)

I'm not huge on party decorations anyway, so it wasn't very hard to avoid buying balloons and streamers to keep costs at a minimum, but when it comes to tablecloths at a park, those are a must!  A friend gave me an awesome tip that the newspaper here in Paradise, which also prints publications for many surrounding areas sells the "ends" of the large newspaper rolls, which still have TONS of paper left, for super cheap ($1.50 per roll!).  We picked some of these up to use now and for many (many, many) art projects to come, taped them to the tables, and put some crayons out for everyone to draw all over them during the party - it was great! 

And the remaining roll was perfect to give us a clean place to set all of our stuff instead of taking up real estate on a table or sitting on the dirt at the park!


I made chocolate and yellow cake cupcakes and three different kinds of frosting, pink vanilla, chocolate and Nutella frosting from Pinterest (it is as yummy as it sounds!).  Since Zoe has a cousin with a nut allergy, I made a double batch of chocolate frosting following the Nutella frosting recipe, but omitting the Nutella.  Then I split the batch in half and added Nutella to one batch, and kept some plain chocolate.  Both were awesome!  A side note: I added all the ingredients together and mixed with the hand mixer instead of mixing things together in stages (since I failed to read the directions on the recipe ahead of time - whoops!), and the frosting turned out just great.


Since we didn't play any games (not necessary at the park!), I set up a cupcake decorating station for the kids.  I made a set of each kind of cupcake in my mini-muffin pans, and set out the pink vanilla and chocolate frosting and sprinkles and let the kids decorate their own cupcakes.  The "do-it-yourself" cupcakes were a hit with the kids!  One lesson learned: I put out "cookie sticks" from JoAnn to use to pick up and dip the mini-cupcakes, but the cupcakes ended up falling off of them easily and forks worked better... perhaps a thinner stick next time?


The birthday girl even had a super-sweet cupcake dress to wear for the party (thanks, Grandma!).  I'd say the party was a great success!!


I had enough paper leftover from the invitations to make these coordinating thank you cards too!


What are your secrets for planning a cute and fun birthday party on a dime?

This post is linked up to the following parties:

Show Me Extraordinary @ The 36th Avenue
Hookin Up HOH @ House of Hepworths
Delightfully Inspiring Thursday @ Delightful Order
Flaunt it Friday @ Chic on a Shoestring Decorating
Inspiration Friday @ At the Picket Fence 
The Sundae Scoop @ I Heart Nap Time
Sunday Showcase @ Under the Table and Dreaming
Motivate Me Monday @ Keeping It Simple
Link Party @ Polish the Stars 
One Project at a Time @ A Bowl Full of Lemons
Simply Sensational Tuesday @ Organized Homelife
Overflowing with Creativity @ It's Overflowing
The Creative Spark @ Clean & Scentsible 
Whatever Goes Wednesday @ Someday Crafts 
Make it Pretty Monday @ The Dedicated House


Related Posts Plugin for WordPress, Blogger...